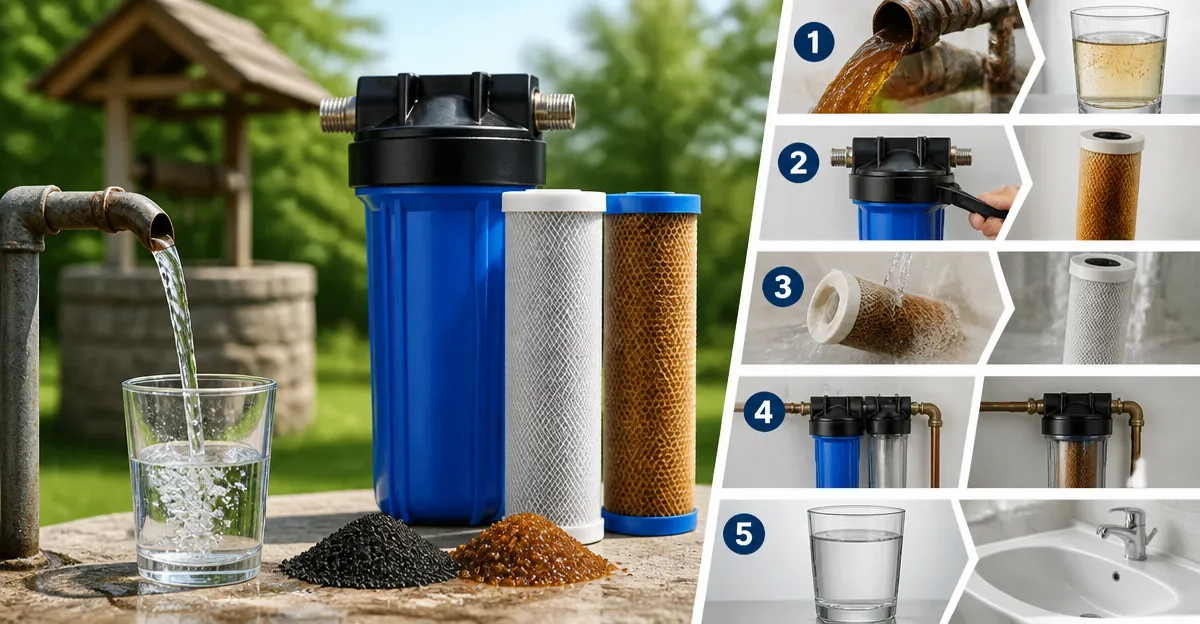
Introduction
One of the most common complaints among well‑water homeowners is the presence of iron, which can cause staining, unpleasant taste, and metallic odor. This guide explains how to assess iron levels, select appropriate filtration technologies, and install a system that operates without a conventional water softener. Readers will learn practical, cost‑effective solutions that can be implemented by a competent DIYer with basic plumbing skills. By the end of the article, one will be able to achieve clear, iron‑free water for drinking, bathing, and household use.
What You’ll Need
- Water testing kit (iron test strips or a digital meter)
- Pre‑filter for sediment and rust particles
- Iron removal device (air injection filter or catalytic media filter)
- Flexible plumbing connectors and T‑fittings
- Adjustable wrench, pipe cutter, and Teflon tape
- Optional: pressure regulator for high‑flow installations
The following products have proven effective in real‑world installations and are linked for convenience. One may choose any compatible brand, but the listed items simplify the procurement process.
Step‑by‑Step Instructions
1. Test Your Well Water for Iron Content
Before installing any equipment, one should determine the concentration of dissolved iron in the water supply. Use a certified water testing kit to measure iron in parts per million (ppm); values above 0.3 ppm typically cause staining, while levels above 1.0 ppm affect taste and odor. Record the result and compare it with the specifications of the filters described in later steps. Accurate testing ensures that the selected system will operate within its design parameters and avoids over‑engineering the solution.
2. Install a Sediment Pre‑Filter
Removing sand, silt, and rust particles protects downstream iron‑removing media from premature clogging. A reliable choice is the PUREPLUS Iron Sediment Filter, which combines a string‑wound sediment filter with an iron‑reducing core. This 2‑in‑1 filter costs $36.89, carries a 4.4‑star rating from 142 reviewers, and lasts up to 3,300 gallons before replacement. Install the filter on the main supply line using the provided 1‑inch NPT connections, ensuring that the flow direction arrow points toward the house. Tighten fittings with Teflon tape to prevent leaks, then flush the system for several minutes to clear any loose media.
3. Choose an Iron Removal Technology
Two principal technologies are available for iron removal: air injection oxidation and catalytic media filtration. Air injection creates microscopic bubbles that oxidize soluble iron, allowing it to be captured by a specialized media bed. Catalytic media, such as Katalox, chemically converts iron to insoluble particles without the need for air. The choice depends on iron concentration, water usage, and budget.
For households with moderate iron levels (0.3–3.0 ppm) and a desire for automated regeneration, the DuraWater Iron Eater Filter is an excellent option. Priced at $810.00, it features a digital air‑injection system, a 1.0 cu ft media tank, and a built‑in control valve that schedules regeneration cycles. Reviewers rate it 4.6 stars based on 372 comments, praising its dramatic improvement in water clarity and taste. Installation resembles that of a conventional softener and can be completed in about ten minutes with flex lines.
If a more compact, lower‑cost solution is preferred, the iSpring Iron & Manganese Filter cartridge fits existing iSpring housings and costs $83.82. It reduces iron from a maximum of 3.0 ppm to 0.01 ppm and manganese similarly, while maintaining a low pressure drop of up to 5 psi at 8 gpm. The product holds a 4.5‑star rating from 636 reviewers and offers a lifespan of 50,000 gallons, roughly one year of typical household use. This cartridge is ideal for retrofitting an existing whole‑house system without extensive plumbing modifications.
4. Install the Selected Iron Removal Unit
After the sediment pre‑filter, connect the chosen iron removal device using the same 1‑inch NPT fittings. For the DuraWater system, attach the mineral tank, bypass valve, and digital control valve according to the manufacturer’s diagram; the unit requires a power outlet for the control electronics. Set the regeneration interval to every 2–3 days for high iron loads, or follow the default schedule for lower concentrations. For the iSpring cartridge, simply insert the FM25B filter into the compatible housing, secure the housing lid, and verify that the inlet and outlet are correctly aligned.
Once installed, turn on the water supply and allow the system to run for at least 30 minutes. Observe the control valve (if applicable) for any error codes, and ensure that the flow rate remains steady. The air injection unit may emit a brief burst of water at the start of each regeneration cycle; this is normal and can be captured with a small drip tray.
5. Set Up a Maintenance and Regeneration Schedule
Regular maintenance preserves filter performance and extends the life of the media. For air‑injection systems like DuraWater, schedule a full regeneration every 2–3 days, which typically consumes 30 gallons of water per cycle. Monitor the control panel for alerts indicating media exhaustion or high back‑pressure. For catalytic cartridges such as iSpring FM25B, replace the filter after 50,000 gallons or 12 months, whichever occurs first.
In addition to scheduled regeneration, inspect the sediment filter monthly for clogging. If the pressure drop exceeds 5 psi, replace the filter element to prevent reduced flow to the iron removal stage. Keep a log of water test results to track improvements and identify any trends that may require adjustments.
6. Verify Water Quality After Installation
After the system has run for several days, retest the water using the same iron test kit employed in step 1. Compare the new reading with the initial measurement; a reduction to below 0.1 ppm indicates successful removal. Conduct a visual inspection of faucets, tubs, and appliances for any remaining staining or discoloration. If iron levels remain high, consider increasing the regeneration frequency or adding a secondary oxidation stage such as a portable aerator.
Document the final results and keep the test strips on hand for periodic verification. Consistent monitoring ensures that the system continues to meet the homeowner’s expectations and that any emerging issues are addressed promptly.
Tips & Pro Tips
- Always shut off the main water supply and relieve pressure before cutting pipe sections.
- Use flexible braided hoses for connections to reduce vibration and noise from the air‑injection unit.
- If the air intake releases water during regeneration, attach a small catch‑tube as described in several user reviews of the DuraWater filter.
- Consider installing a pressure regulator downstream of the iron filter when using high‑flow fixtures such as garden hoses or fire sprinklers.
- Store replacement filter cartridges in a cool, dry place to preserve their media integrity.
Troubleshooting
- Low flow after installation: Check for kinks in flexible lines, verify that the bypass valve is fully open, and clean the sediment pre‑filter.
- Persistent orange stains: Increase regeneration frequency, or add a secondary oxidizing device such as a small aerator before the iron filter.
- Unusual noises from the air‑injection unit: Ensure that the air pump is securely mounted and that the air intake is not obstructed.
- Filter media plugging: Perform a thorough back‑flush of the media tank during regeneration, and consider using a larger media volume if iron concentrations exceed 3 ppm.
Conclusion
One can remove iron from well water effectively without relying on a traditional water softener by following a systematic testing, filtration, and maintenance approach. By installing a sediment pre‑filter, selecting an appropriate iron removal technology, and adhering to a regular regeneration schedule, homeowners achieve clear, odorless water for all household uses. The recommended products—DuraWater Iron Eater Filter, iSpring Iron & Manganese Filter, PUREPLUS Iron Sediment Filter, and related accessories—provide reliable tools that simplify the process while delivering professional‑grade results. Implement the steps outlined in this guide, monitor water quality, and enjoy the long‑term benefits of iron‑free water.
Products Mentioned in This Guide
Frequently Asked Questions
How do I test the iron concentration in my well water?
Use a water testing kit with iron test strips or a digital meter, collect a fresh sample after the water runs for a few minutes, and compare the result to the kit’s chart or readout.
What filtration method removes iron without using a traditional water softener?
Air‑injection (oxidizing) filters or catalytic media filters such as Birm or Greensand oxidize dissolved iron and trap it in the media.
Is a pre‑filter required before the iron removal device?
Yes, a sediment pre‑filter captures rust particles and sand, preventing premature clogging of the iron filter.
Can a DIY homeowner install an iron removal system?
A competent DIYer with basic plumbing tools can install the system by cutting pipe, adding T‑fittings, and following the manufacturer’s instructions.
How often should the iron filter media be serviced or replaced?
Typically every 12–18 months, or sooner if water flow decreases or iron breakthrough is detected in the output.